

Hey there! Happy New Year! I started making most of our bread in 2023 and haven’t really found a great way to store things yet, but I was gifted a sewing machine last week and decided to make some bread bags!

I had some fabric napkins that I thought would be a great size for my bread bags!

With the back side of the napkin facing up, I started cutting off the finished seam around the edge of the fabric napkin.

I saved the strip I cut off to use as the drawstrings for the bread bag.

With the back of the napkin still facing up, I folded it in half.

I sewed the other short side and the non-folded long side with a straight stitch, stopping at my pin.

It’s a little hard to see since my thread is white, but after sewing, I’m left with a flap on the top at one side where I stopped sewing the long side at my pin.


I need the flap to go all the way across, since this is where my drawstring will go for my bag, so I cut an adjacent slit on the folded side.


I also trimmed off the extra fabric around my new seam, just so it looks nicer when it is flipped right side out.


I sewed this with another straight stitch and now have half of my pocket for the drawstring.

I folded the other flap in to match the first one and pinned it in place.

I sewed it the same way, except I overlapped my previous stitches a little to prevent tearing.

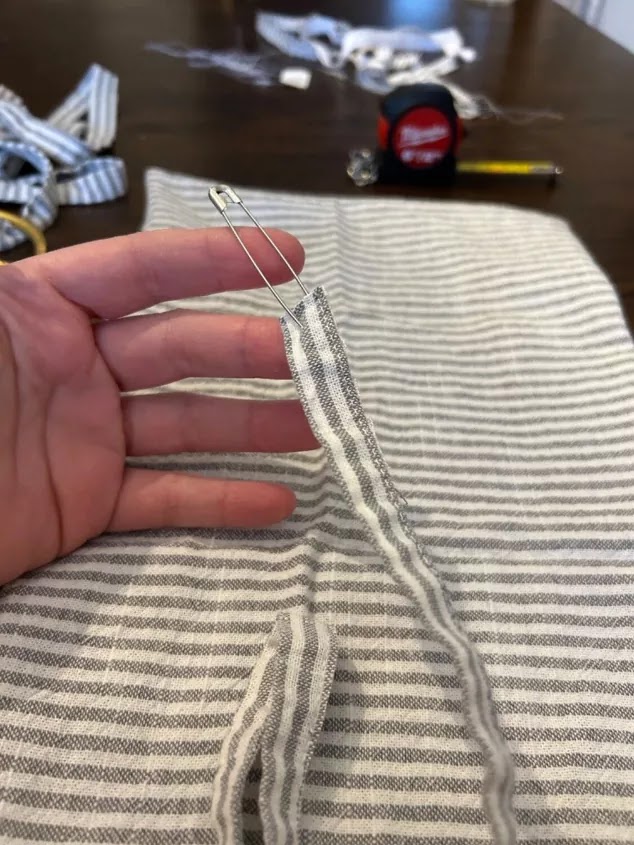
I divided the strip I cut off earlier in half for the bag drawstring. To add the drawstring, I poked a safety pin through the end. The safety pin makes it easy to fish the drawstring through the pocket.

I fished the drawstring through one side and continued it through the other side.

You should have 2 ends of the drawstring on one side after fishing it through the pocket.

For the second drawstring, I started fishing it through on the opposite side, since I want to have 2 ends of the drawstring on each side to close the bag.

I fished the second drawstring on the underside of the first drawstring at the corner.

You could knot the drawstrings on each side, but I chose to sew them together for this bag.

I did make another bag with twill tape for the drawstring where I knotted the drawstrings together on each side.

You just pull each side of the drawstrings to close the bag. They turned out super cute and fit a loaf of bread perfectly! I used a standard loaf pan and have extra room in the bag. These bags work great for sourdough; if I do a sandwich bread that I want to remain soft, I just wrap the loaf in BEESWAX WRAP before putting it into the bag.
Links to these products:
*May contain affiliate links


0 Comments:
Post a Comment