

Hi friends! For years I have thought I didn’t have a big enough yard for a garden and told myself I could start a garden when I get a bigger house with a bigger yard, until now! This year, I decided I make the most of our small space for every other want, so I would figure out how to do a garden. I started out thinking I would just incorporate more fruits and veggies in my containers that I normally plant flowers in all around my house, but then one afternoon when I was pulling weeds around our shed, I realized we have plenty of unused space that would be great for some raised garden beds!

We have 6 feet on the side and back of our shed between our neighbor’s fences, as was required by our city. These areas are leveled crushed concrete from when we put in our shed foundation, so I plan to do a potting station in the back and the garden on the side.

To prep this area for my garden, we used a weed burner to burn all the weeds. It is pretty dry where we live right now, so we wet the fence and shed down with water, and I stood by with the hose to keep watering the area while my husband used the weed burner. This saved so much time!

I chose to use Vegega metal raised beds for my garden. I got two of the 17” tall 9 in 1 raised garden beds that I installed in 8’x2’ and then one 17” tall 42” round raised garden bed for my space. They are shipped in panels that you put together.

Vegega’s 9 in 1 raised garden bed is super cool, because it can be installed in nine different configurations! All their beds are available in four different colors. I chose the color ‘Oyster White’, I would say it’s closer to an oatmeal color.
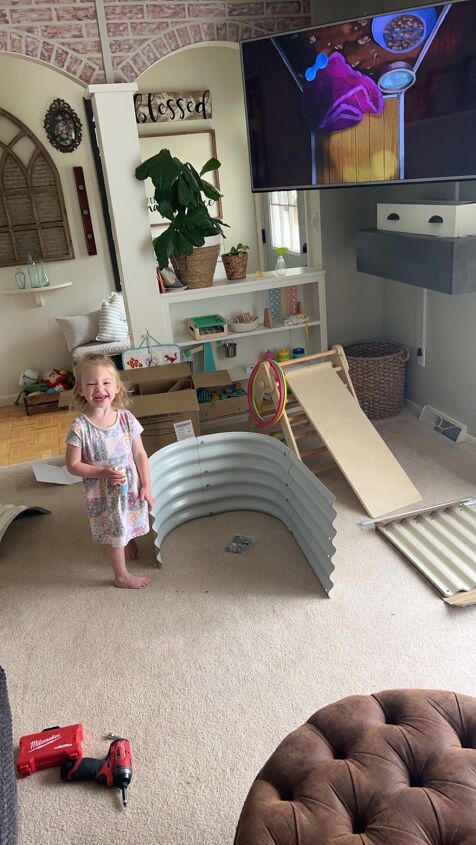

My daughter and I assembled our garden beds inside - they were light enough for me to carry outside by myself. You just peel the protective film off each panel and then line the holes on the edges of the panels up and add the hardware - a bolt on the outside and washer with nut inside. Super easy!

All set up and ready to fill! We decided to put the round bed in the back and the two longer beds in front. We have 2 feet of space on each side and between each garden bed.

There are tons and tons of opinions/ways to fill the bottom of a raised garden bed. We went with the simplest option for us - a layer of cardboard, fill sand, and then a garden blend compost. If we would have had leaves, twigs and other yard waste handy, I would have used that instead of sand, but we disposed of all that last fall. I would estimate we had less than 1” of cardboard.
Since we have 6” of crushed concrete as our base, we don’t have to worry about burrowing visitors coming under our beds. If this wasn’t the case, we would have probably put down some kind of steel netting under the cardboard.

We visited my husband’s work (an excavating company) to pick up the sand. He said we got half a yard. Most excavating companies sell fill sand, if you want to do this too!

We added the sand on top of the cardboard in our raised beds up to the third bolt - about 6”. The sand will help with drainage and is a cheaper option to fill the bottom portion of a raised bed.

We got a yard of garden blend compost from our local nursery to fill the remainder of our garden beds.
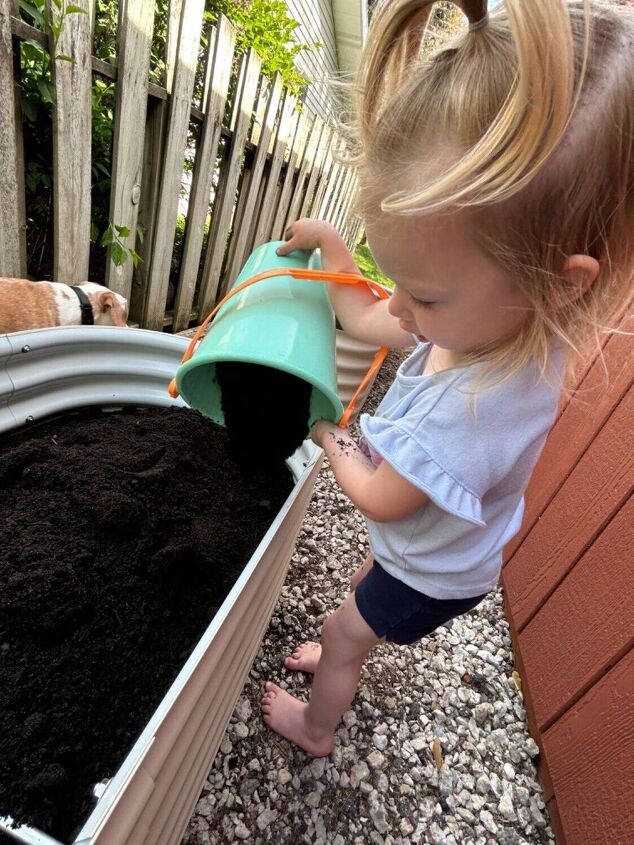
Our little helper! 💛

We found it easiest to shovel our sand and compost into buckets from the back of the truck and then dump the buckets into the garden bed instead of having to shovel into a wheel barrel and shovel back out of the wheel barrel, since the beds are taller than a wheel barrel.
My husband’s tailgate is at the body shop right now, but it turned out to be really handy not having to climb over it or lift heavy buckets over the extra distance! We definitely recommend removing the tailgate if you do this project too! He said it only takes a few minutes to remove them.

Here it is! I think this is such a great use of this space! I plan to add a couple arched trellises between the beds as well, so check back next month to see what we plant.
If you want to check out VEGEGA'S METAL RAISED GARDEN BEDS, you can save 10% by using coupon code CRAFTINGUPCUTENESS.


0 Comments:
Post a Comment